![]()
![]()


![]()


Please Call
(702) 324-6463
or email sales@nitevis.com
|
|
|
Categories |
||||||||||||||||||||||||||||||||||||||||||||||||||||||||||||||||||||||||||||||||||||||||||||||||||||||||||||||||||||||||||||||||||||||||||||||||||||||||||||||||||||||||||||||||||||||||||||||||||||||||||||||||||||||||||||||||||||||||||||||||||||||||||||||||||||||
Helpful Info
Export
Regulations
|
ITT-F7201/Aurora 8010 (Gen III)
/VisionMASTER VM56
ITT-F7201/Aurora 8016 (Gen III)
/VisionMASTER VM80
Aurora 8010(VM56)
Aurora 8016(VM80)
Temporarily Unavailable
Ships with a
Soft Carry Case, Battery and Operator Manual.
Optional
Accessories Include:
Part#: Hard Case, Black
Universal Rail, Weaver
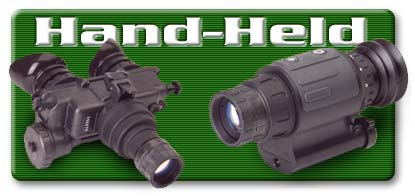
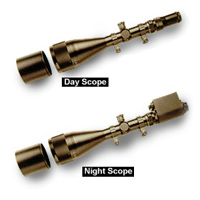
 The Aurora 8010/VM56/F7201 modular
day or night weapon sight enables users to employ the same basic sight
unit for both day and night operations while maintaining weapon zero by
providing interchangeable daytime and night vision modules.
The Aurora 8010/VM56/F7201 modular
day or night weapon sight enables users to employ the same basic sight
unit for both day and night operations while maintaining weapon zero by
providing interchangeable daytime and night vision modules.
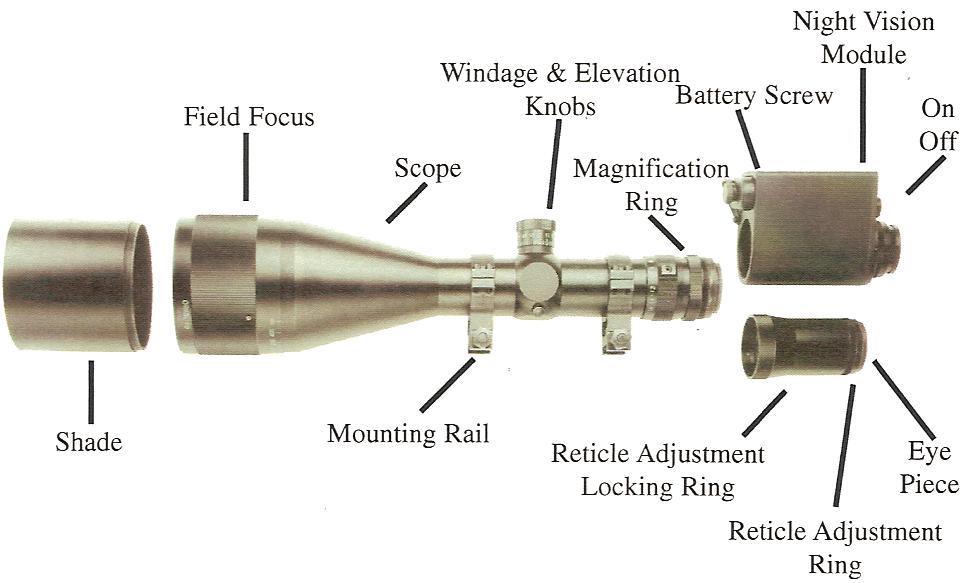
The day scope portion of the Aurora 8010/VM56/F7201 is a precision, high quality ×2.5 to ×10 variable scope with a 56 mm focusable objective and detachable glare hood. The sight reticle is forward of the eyepiece so is not disturbed when the eyepiece modules are changed from day to night operation. Weapon zero is set using turret knobs providing precise adjustments with distinct 0.25 MOA (minute-of-angle) audible and tactile increments.
 The night vision module features an integral covert infrared illuminator
for additional illumination under dark conditions and the eyepiece
module uses a 3rd generation image intensifier. The daytime eyepiece
provides +2 to -2 Diopter's of focus adjustment and offers a 5 mm
(minimum) exit pupil at 76 mm of eye relief when set at ×10. The lower
magnification settings have a larger exit pupil diameter. The night
vision eyepiece also offers a minimum 5 mm exit pupil at 64 mm of eye
relief. The Aurora 8010/VM56/F7201
can be mounted using standard 30 mm scope mounts that accommodate the 56
mm diameter objective.
The night vision module features an integral covert infrared illuminator
for additional illumination under dark conditions and the eyepiece
module uses a 3rd generation image intensifier. The daytime eyepiece
provides +2 to -2 Diopter's of focus adjustment and offers a 5 mm
(minimum) exit pupil at 76 mm of eye relief when set at ×10. The lower
magnification settings have a larger exit pupil diameter. The night
vision eyepiece also offers a minimum 5 mm exit pupil at 64 mm of eye
relief. The Aurora 8010/VM56/F7201
can be mounted using standard 30 mm scope mounts that accommodate the 56
mm diameter objective.
|
Viewing Capabilities of 3rd Gen, 64+lp/mm Aurora 8010 |
|||||
|
LUX |
0.1 |
0.001 |
0.0005 |
0.0001 |
0.00001 |
|
|
Moonlit |
Half Moon |
Quarter Moon |
Starlit |
Cloudy |
|
Gen III |
800 m |
750m |
700m |
500m |
300m |
|
Impact (Drop Test) |
</= .5 MOA of deviation after 1000 drops (800G) |
|
High Temperature |
Storage: 23 degrees C to 68 degrees C |
|
|
Operation: 23 degrees C to 52 degrees C |
|
Low Temperature |
Storage: 23 degrees C to -40 degrees C |
|
|
Operation: 23 degrees C to -20 degrees C |
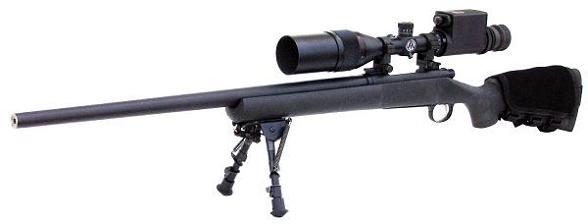
One of the most versatile Day/Night systems available on the market today!
 It is no longer necessary to
maintain a dedicated Night Vision weapon and a dedicated Day Weapon
system. The
Aurora 8010 (also
sold as the ITT F7201 or Vision MASTER 56)
Series Scope, a Generation 3 device, is ready 24 hours a day. When light
levels get low enough that use of the day scope is prohibited, the
Aurora 8010
can be switched from a day scope to a night scope in less than
10 seconds, with no special tools and no shift in point of impact. Ask
about the A.R.M.S. throw-lever rings (30mm for Aurora 8010/VM56 and 40mm for
Aurora 8016/VM80). The special lens coating is designed to
give optimum light transmission in the light wave of 400 to 900nm (nanometers). The reticle is a triplex MILDOT ranging reticle, which
gives accurate ranging both day and night. The special 56mm or 80mm
objective lens gives the clearest image in the lowest light of any rifle
scope you'll find anywhere. in the world today.
It is no longer necessary to
maintain a dedicated Night Vision weapon and a dedicated Day Weapon
system. The
Aurora 8010 (also
sold as the ITT F7201 or Vision MASTER 56)
Series Scope, a Generation 3 device, is ready 24 hours a day. When light
levels get low enough that use of the day scope is prohibited, the
Aurora 8010
can be switched from a day scope to a night scope in less than
10 seconds, with no special tools and no shift in point of impact. Ask
about the A.R.M.S. throw-lever rings (30mm for Aurora 8010/VM56 and 40mm for
Aurora 8016/VM80). The special lens coating is designed to
give optimum light transmission in the light wave of 400 to 900nm (nanometers). The reticle is a triplex MILDOT ranging reticle, which
gives accurate ranging both day and night. The special 56mm or 80mm
objective lens gives the clearest image in the lowest light of any rifle
scope you'll find anywhere. in the world today.
Utilizing a "Top-of-the-Line" 3rd Generation Night Vision Image
Intensifier, the 64+lp/mm resolution enhances the 4-layer special coating
(anti-reflective for 400-900nm) for all lenses
in front of second focal
plane and Multi-coating for eyepiece lenses.
Outer edge of reticle glass
and first objective are blackened. The system includes a 4x lens to use as a Night Vision Monocular and
ARMS sniper grade rings to keep your zero in place.
|
|
High Power |
Low Power |
Tolerance |
|
VM56 Magnification |
10x |
2.5x |
10x: +/- 5% |
|
VM80 Magnification |
16X |
6X |
2.5x: +/- 5% |
|
Effective Objective Diameter |
56mm |
80mm |
+/- 1mm |
|
Exit Pupil Dia. VM56 |
5.6mm |
13.5mm |
+/ 10% |
|
Exit Pupil Dia. VM80 |
5mm |
13.6mm |
|
|
Real Field of View VM56 |
2° (6.55') @ 100m |
6.6° (11.5') @ 100m |
+/- 5% |
|
Real Field of View VM80 |
3.3 degrees |
3.3 degrees |
+/- 5% |
|
Resolution on Axis |
3 degrees |
6 degrees |
|
| Mounting | 30mm Mounting Rings | ||
| Power Requirements | 2 AA Batteries | ||
| Focus Range | 30m to infinity ∞ | ||
|
Diopter Range |
+/- 2 Diopters |
|
|
|
Eye Relief VM56 |
57-87mm at 10X |
52-81mm at 2.5X |
|
|
Eye Relief VM80 |
49-77mm at 16X |
30-89mm at 6X |
|
|
1 Click VM56 |
.25 MOA |
50MOA total |
|
|
1 Click VM80 |
.25 MOA |
60MOA total |
|
|
Reticle Adjustment Range |
.25 MOA |
|
|
|
Tracking |
.25/15 MOA |
|
|
|
Reticle Tilt |
1 degree |
|
|
|
Diopter Deviation by Zooming |
</= .3D |
|
|
|
Image Jump by Impact |
.5 MOA |
|
|
|
Image Jump by Rotating PC Ring |
1 MOA |
|
|
|
Torque of PC Ring |
2 to 4 kg cm |
|
|
|
Objective Focus Shift |
1 MOA |
|
|
|
Impact (Drop Test) |
</= .5 MOA of deviation after 1000 drops (800G) |
||
|
High Temperature |
Storage: 23˚C to 68˚C |
||
|
|
Operation: 23˚C to 52˚C |
||
|
Low Temperature |
Storage: 23˚C to -40˚C |
||
|
|
Operation: 23˚C to -20˚C |
||
|
Air Tightness (Fog)
|
|||
|
Coating
|
|||
|
Blackened Lens |
|||
|
VM56 Weight |
Without NV |
1 lbs 15oz. |
|
|
|
With NV |
3 lbs 5oz. |
|
|
VM80 Weight |
Without NV |
4 lbs 2oz. |
|
|
|
With NV |
5 lbs 3oz. |
|
|
VM56 Total Length |
Without NV |
13.375" |
|
|
|
With NV |
14" |
|
|
VM80 Total Length |
Without NV |
17.25" |
|
|
|
With NV |
18.25" |
|
|
Distance from basic plane to second focal plane : 14.2 +/- 0.1 |
|||
Mounting Instructions
1. The mounting rings come in 2 pieces held together by Allen screws. Remove the Allen screws and remove the top portion of the ring.
2. Loosen the nut at the base of the bottom rings but do not remove the nut.
3. Place the dovetail portion of the bottom rings on the rail. Do not tighten the nut.
4. Place the scope onto the bottom rings until it sits freely. Be sure to have access to the reticle adjustment knobs and that you have adequate eye relief.
5. Tighten the nuts to the rail.
6. Lock the rifle in a vertical position and sight on a vertical line. Rotate the scope until the reticle crosshair exactly matches the vertical reference line you are sighting (i.e.; weighted string or corner of a building). Attach the top rings and slowly tighten the Allen screws. For best results, tighten in a rotation to reduce stress. Locktite may be added to the screws to retain them in place. Not required.
7. The sighting system is now ready for the initial sighting in.
To change from day to night vision, turn the lock ring in front of
the eyepiece counter-clockwise until loose. Remove the eyepiece and
install the night vision module and tighten the lock ring. This can be
accomplished in less than 30 seconds without the use of special tools
and in no light conditions.
![]()
Home | Contact Us | About KERIF | Export Regulations | How to Order

![]()
(702) 324-6463 / (702)
869-8451 FAX
sales@nitevis.com or kerifnightvision@earthlink.net